ghost mannequin photography
Ghost Mannequin Photography: A Complete How-To Guide
Master ghost mannequin photography with this step-by-step guide covering garment prep, shoot setup, editing workflow, and tips for consistent ecommerce output.
A buyer opens an apparel product page, sees a flat garment with creases and a collapsed neckline, and leaves before reading the details. The product may be well made, but the image hasn't shown its shape, construction, or proportion clearly enough to earn another second of attention.
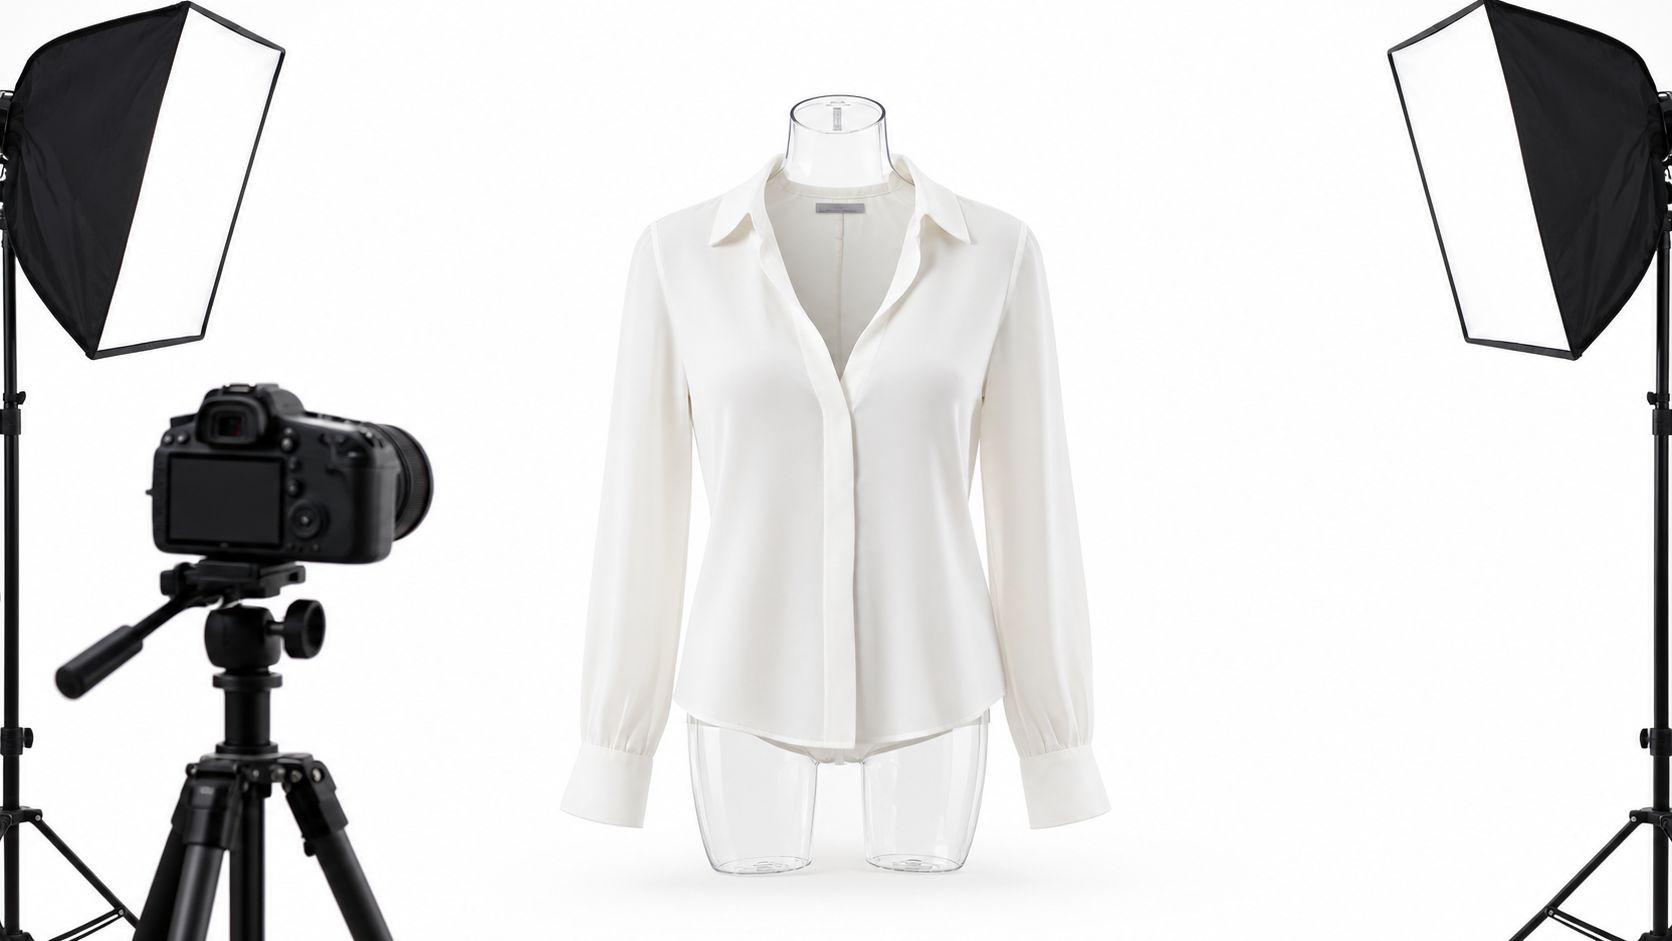
Ghost mannequin photography, also called invisible-mannequin photography, solves part of that problem. You photograph the garment on a mannequin, often from multiple angles, remove the visible form in post-production, and blend in a separate interior neckline image. The result preserves the garment's three-dimensional structure while presenting it as if it were worn by an invisible person. The method is different from a flat lay, which shows clothing horizontally, and from on-model photography, which adds fit and styling context. Centra's ecommerce photography guide describes the same capture-and-composite principle.
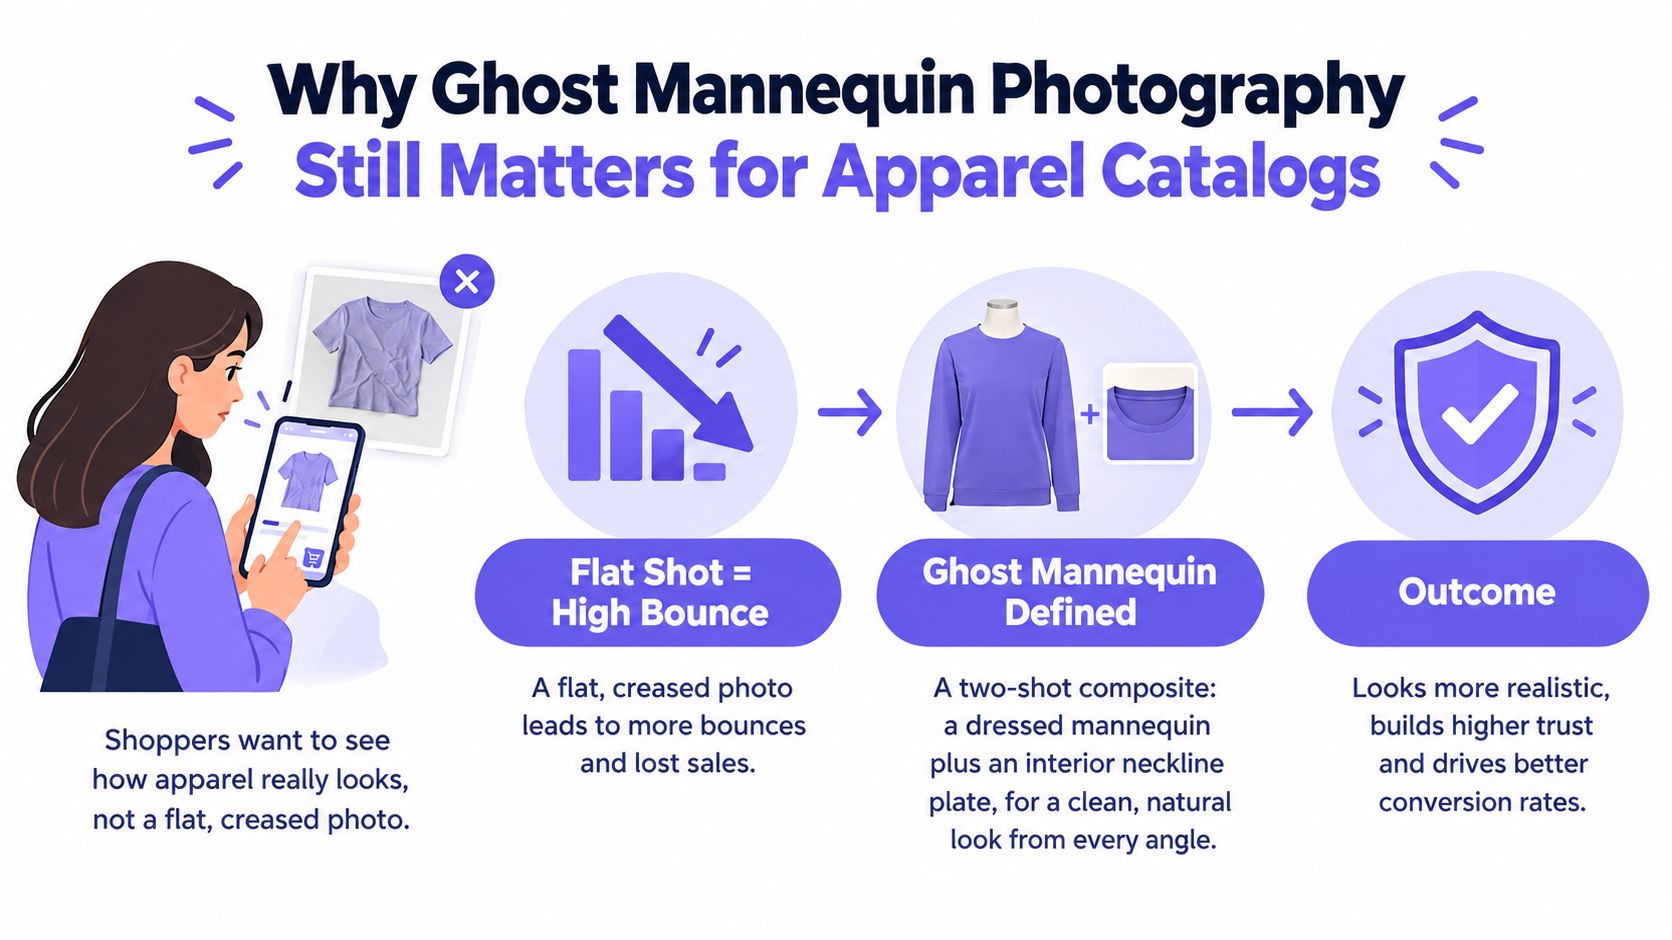
Table of Contents
- Why Ghost Mannequin Photography Still Matters for Apparel Catalogs
- Preparing the Garment and Mannequin Before the Shoot
- Studio Setup and Capture for a Clean Composite
- Editing Workflow That Removes the Mannequin Cleanly
- Consistency Controls Across a Full SKU Set
- When Ghost Mannequin Imagery Is Not Enough
- Final Review, Export, and a Production Habit That Prevents Reshoots
Why Ghost Mannequin Photography Still Matters for Apparel Catalogs
A flat shot can show the full outline of a shirt, but it often suppresses the information shoppers need to judge its construction. The neckline can collapse, sleeves can lose volume, and the relationship between the front panel and the side seams becomes harder to read. Ghost mannequin photography restores that volume without making the image about a model's face, pose, or styling.
The workflow is a controlled composite. First, the garment is fitted to a mannequin and photographed from the required views. The mannequin is then removed from the visible areas, and an interior-neckline exposure is placed behind the opening. A careful retouch preserves the collar, label, inner back panel, torso depth, sleeve shape, and other construction details that make the garment look like a real object rather than a cutout.
The catalog advantage
Catalog teams use this format because it creates a repeatable visual system. Multiple colors and sizes can appear against the same background with a similar silhouette, which makes category pages easier to scan and product comparisons less distracting. A retailer also avoids arranging a complete model shoot for every variation when the primary need is a clean product-focused view.
The format remains common in professional fashion ecommerce. A survey of major fashion ecommerce websites reported ghost-mannequin usage at 57.2%, the same reported rate as flat-lay photography. Model photography was reported at 95.6%, while lifestyle imagery appeared at 38.4% of surveyed brands. The survey source also reported that 76.1% of brands used more than one photography style, while only 51.6% applied those styles consistently across all products. Those figures describe a surveyed group, not every apparel retailer worldwide, but they show why ghost mannequin imagery remains a serious catalog format rather than a niche studio trick.
Practical rule: Use ghost mannequin imagery to standardize the product view, not to pretend that one image can answer every shopper question.
The trade-off photographers need to accept
The clean result hides a demanding production process. Someone must steam and fit the garment, keep the camera and lighting stable, capture the inside neckline, build the mask, remove mannequin fragments, and inspect the composite closely. Retouching labor doesn't disappear. It moves later in the workflow.
The technique also leaves important questions unanswered. It shows silhouette and construction, but it can't demonstrate how fabric drapes across different bodies, how a trouser inseam looks at a particular height, or how a dress moves while walking. That limitation matters when shoppers are deciding whether a garment will fit, stretch, or coordinate with other pieces. The strongest catalog normally treats ghost mannequin photography as one layer in a broader product visual system.
Preparing the Garment and Mannequin Before the Shoot
The retouching session starts before the camera is switched on. A garment that is badly fitted to the form creates problems around the shoulders, armholes, placket, hem, and neckline. Those problems are harder to fix after the mannequin has been removed because the retoucher no longer has a reliable reference for the fabric's intended shape.
Match the form to the product
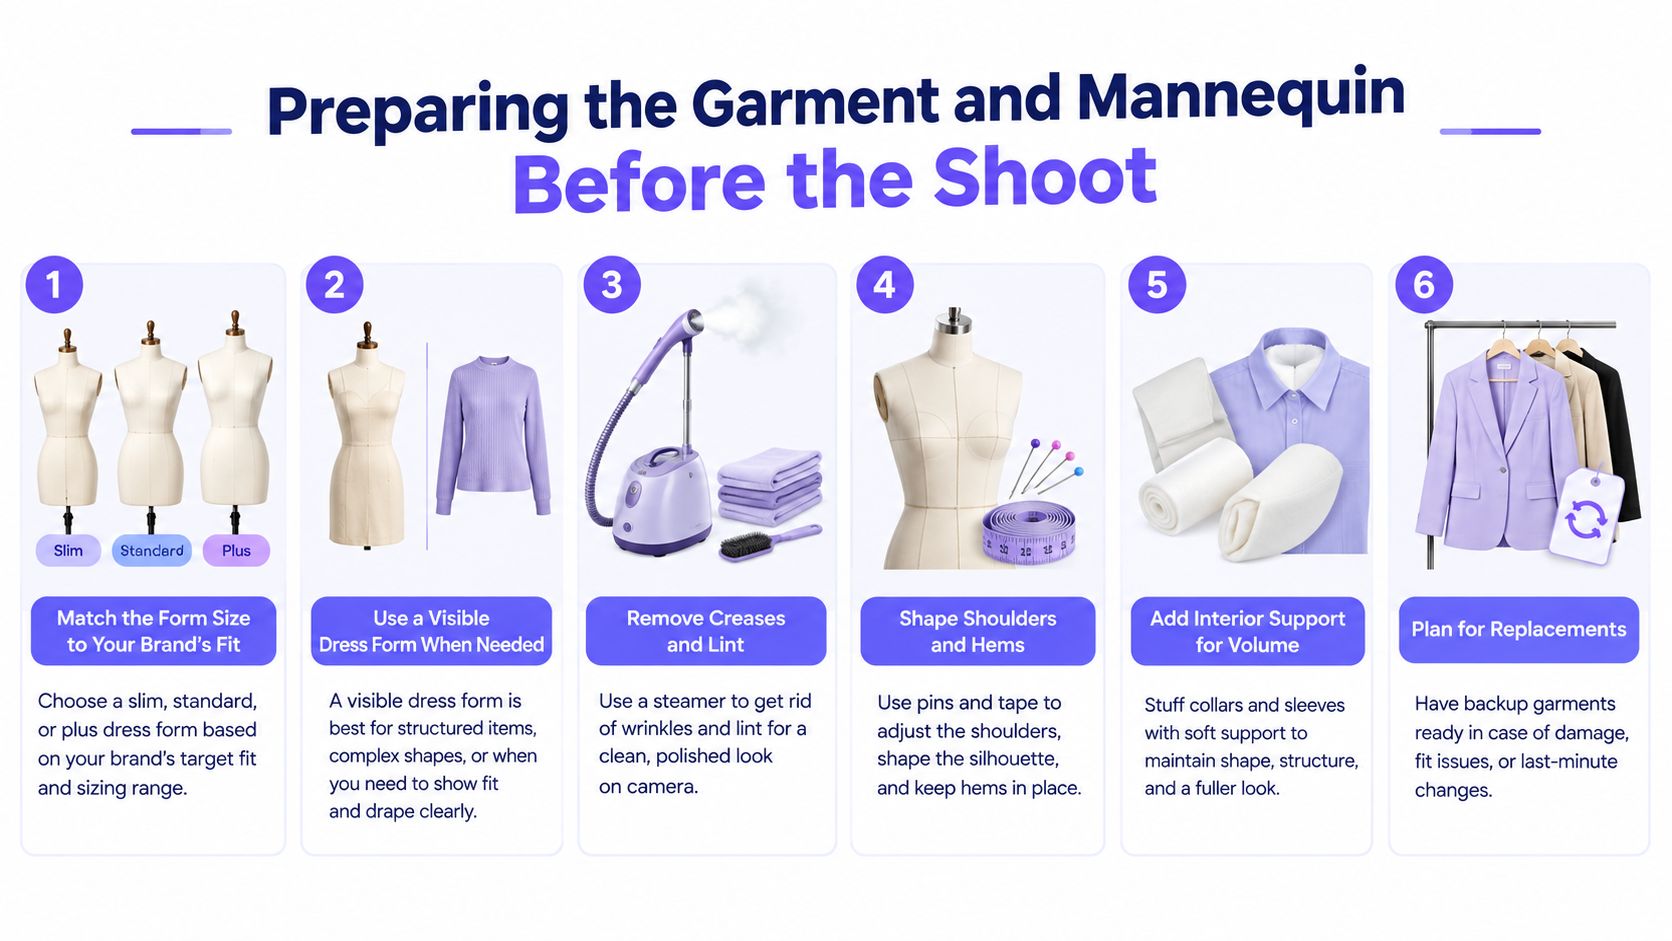
Choose the dress form according to the fit you need to represent. A slim form can make a relaxed garment look more generous than it is, while a larger form can pull the chest, armholes, and closures out of their natural position. Use a removable-piece mannequin when you need a clear interior neckline exposure. A rigid form is often easier for repeatable catalog work, while a posable form can help with unusual sleeves or garments that need a controlled change in posture.
Don't force a small garment onto a form that stretches it. If the garment is too large, control the excess from behind with discreet pins or clips. Keep those adjustments vertical and hidden rather than pulling fabric sideways across the chest, where tension creates visible distortion.
Prepare the fabric, not just the outline
Steam the garment thoroughly, then give it time to settle before fitting. Run a lint roller over dark fabrics and inspect the surface for loose threads, pin dents, tags, and packing creases. Button plackets, zippers, cuffs, and collars should be arranged exactly as the product will appear in the final catalog.
Fit the garment in this order:
- Set the shoulders: Align shoulder seams with the form's shoulder edge. If one shoulder sits higher, correct the form or garment before shooting.
- Square the center: Place the placket, zipper, center seam, or print on the vertical axis. A small lean becomes obvious when several products are displayed together.
- Control the hem: Pin or clamp excess fabric from the back so the hem hangs at a predictable length without flaring.
- Shape the openings: Tuck excess fabric at the neck, smooth the underarm gusset, and keep sleeve openings from collapsing.
- Support soft areas: Add restrained internal support where needed to preserve volume. Overstuffing makes the garment look inflated rather than worn.
A good prep session saves more time than an aggressive cleanup pass. Retouching can remove a mannequin. It can't reliably invent the correct tension, drape, or seam position after the fact.
The pre-shoot check
Before the first exposure, inspect the garment straight on and from the side. Look for wrinkles radiating from the bust, sleeves that twist, a back hem that lifts, or a neckline that doesn't expose enough interior fabric for the composite. Confirm that the form is centered and that the garment hasn't shifted while you adjusted the lower half.
The retoucher's preferred checklist is simple: clean fabric, centered seams, level shoulders, controlled hem, visible label when relevant, removable mannequin pieces ready, and a clear plan for the interior image. Photographing a damaged or poorly fitted garment doesn't create a usable source. It creates an expensive problem with more pixels.
Studio Setup and Capture for a Clean Composite
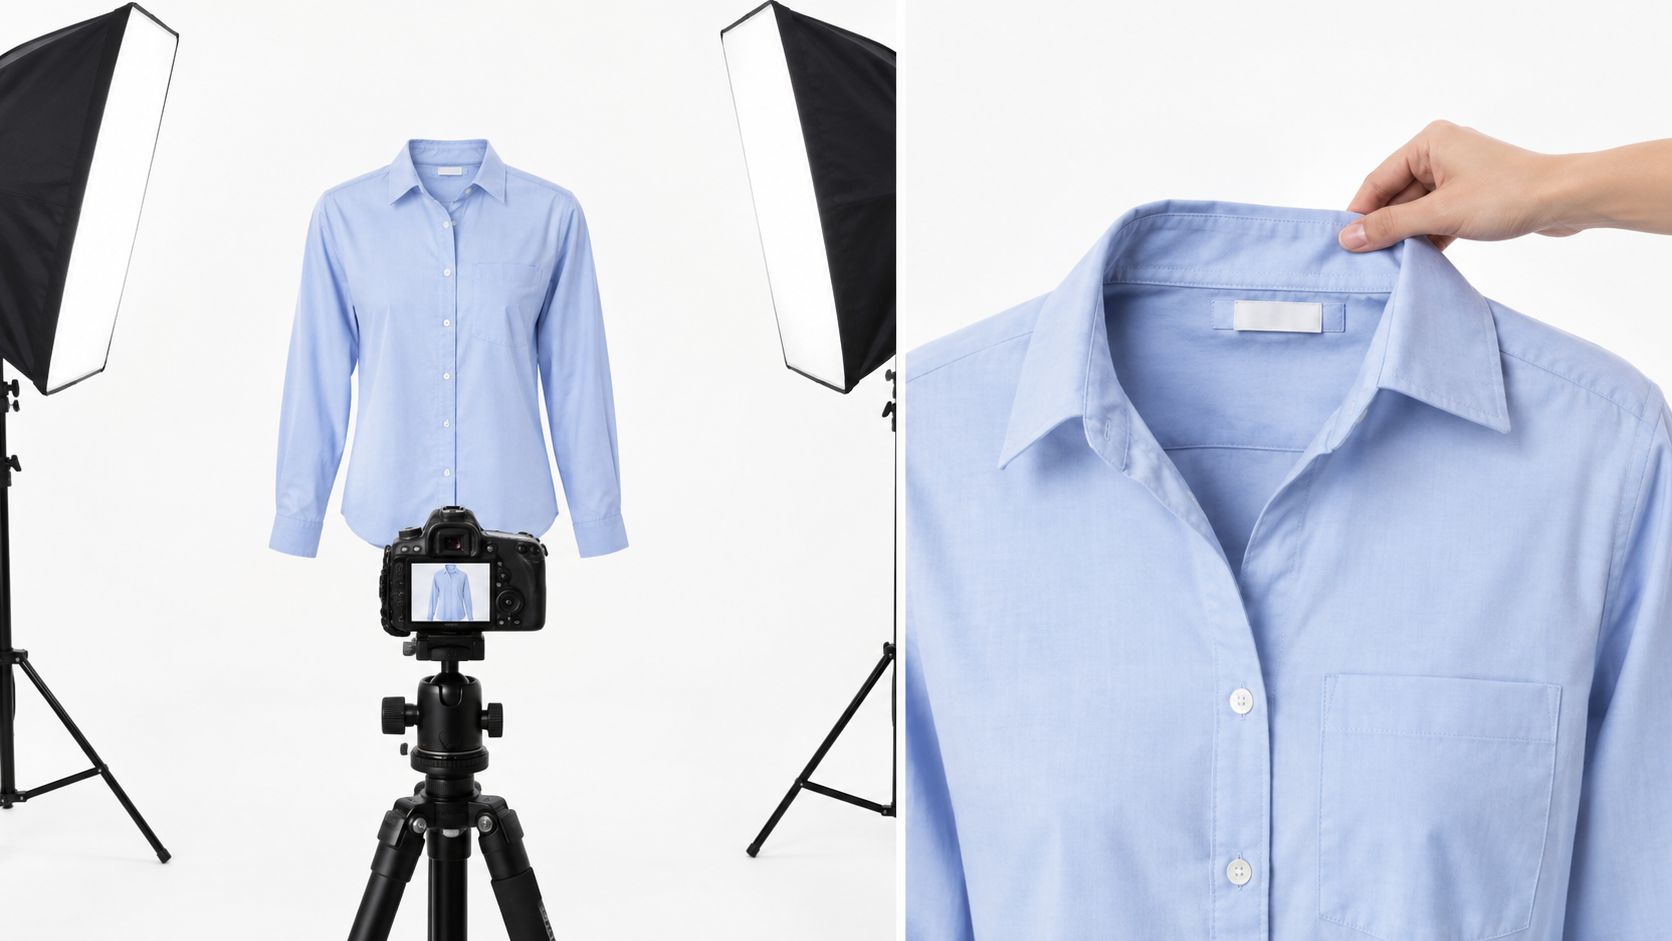
Consistency begins with a locked camera, not with Photoshop. Put the camera on a tripod, keep it level with the garment's visual center, and shoot tethered when possible so framing and focus can be checked on a larger display. Mark the mannequin position so it can return to the same place after the form is opened or the garment is repositioned.
Use broad, diffused illumination with even coverage across the garment. Hard directional shadows create deep edges under collars, sleeves, and armholes, which makes masking and blending more laborious. A white sweep helps simplify background cleanup, but don't rely on the background to hide poor lighting. The garment still needs readable texture and controlled contrast.
Lock the variables
Set the camera height, focal length, exposure, and white balance before the batch begins. Don't let an automatic setting change between a pale shirt and a dark jacket. A tonal shift may look minor in isolation, but it becomes obvious when adjacent product thumbnails don't share the same background white or garment brightness.
Keep enough margin around the garment for cropping, edge cleanup, and controlled shadow work. If the hem sits too close to the frame edge, the retoucher loses room to correct a slight flare or create a consistent crop. The finished image should be composed for the intended ecommerce display, not merely for the camera's uncropped frame.
For a broader production workflow that connects capture, editing, and reusable fashion assets, see this AI fashion product photography workflow. The same principle applies whether the source is created in a studio or prepared for downstream automation. Stable inputs make every later decision easier.
Capture the sources the edit actually needs
A reliable sequence includes the primary front view, relevant back or side views, and a dedicated interior-neckline image. Rotate the mannequin rather than moving the camera when capturing alternate views. That preserves the relationship between framing, scale, and lighting.
The interior exposure deserves deliberate attention. Remove or reposition the garment and photograph into the neckline so the inside back panel, collar construction, and label are visible where appropriate. Keep the same camera and lighting conditions. An insert captured under different white balance or from a mismatched angle will look pasted in even if the mask is technically accurate.
Capture discipline: The interior neckline image isn't a backup shot. It's one of the source layers that makes the hollow opening believable.
Check the front, back, and interior files before breaking down the setup. Look for a missed button, a sleeve turned inside out, a clipped label, or a wrinkle that only appears under the final lighting. A quick tethered review can prevent a complete reshoot.
Editing Workflow That Removes the Mannequin Cleanly
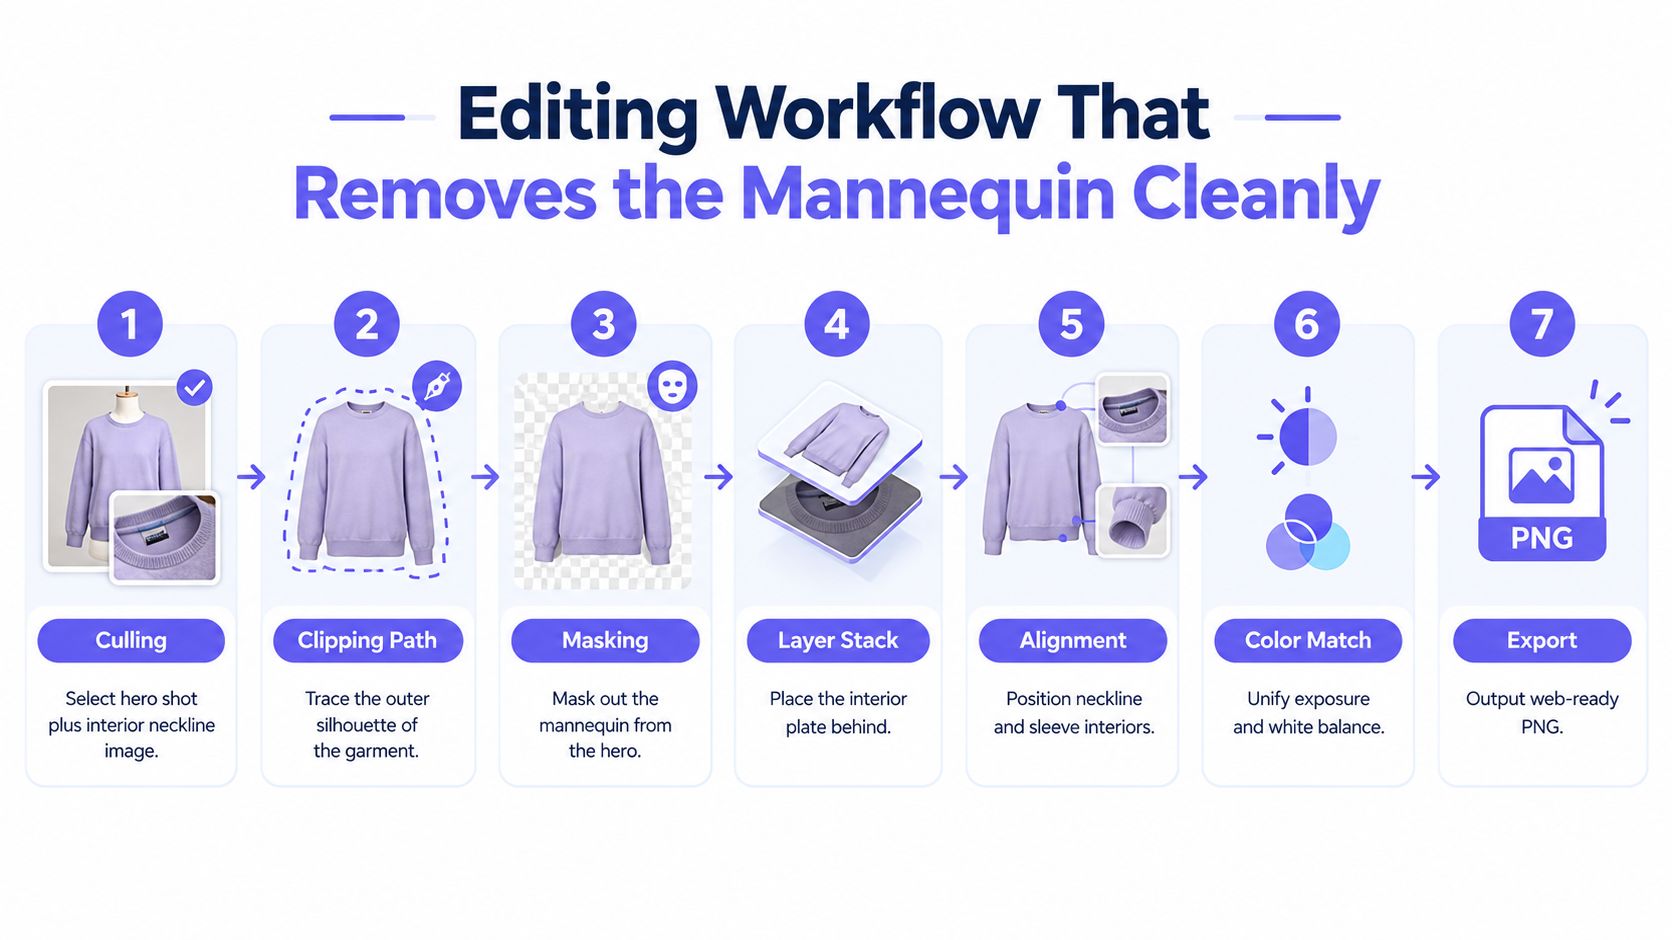
A convincing composite depends on order. Start with the sources that define the garment, then remove the form, then rebuild the openings. If you begin by erasing visible mannequin fragments without understanding the interior image, you can create a clean hole that has no convincing depth behind it.
Build the garment mask first
Cull the set and select the strongest hero frame alongside the matching interior-neckline image. The hero frame should have the best fabric behavior, the cleanest shoulder line, and enough margin for the required crop. Don't select a source only because its exposure is bright. A crooked seam or collapsed sleeve will survive into the final image.
Create a precise clipping path or mask around the outer silhouette. Keep the path close to the actual edge, but don't cut into soft fabric fibers. A restrained feather can help with natural edges, while hard, angular masking tends to produce a sticker-like outline.
Remove the visible neck, shoulders, arms, and mannequin gaps with the mask rather than destructively erasing pixels. If the background or form has clean reference areas, a reference plate can help. Content-aware tools are useful for simple regions, but they shouldn't be trusted to reconstruct a collar, seam, or label without inspection.
Reconstruct the openings
Place the interior-neckline image behind the garment layer. Align the collar curve, inner back panel, and label with the opening in the hero frame. Perspective and depth must agree. If the interior image was photographed from a different position, warping it until it fits may distort the fabric and make the label look stretched.
Blend the join with a mask and restrained cloning or healing. Match the interior's color, exposure, and grain to the exterior garment. A white collar interior beside a warmer outer fabric can look like a color error, while a perfectly smooth insert inside a textured knit looks artificial.
The outfit photo editing workflow is useful context for teams thinking about editing as a repeatable asset process rather than a one-off Photoshop exercise. The same operational mindset applies here: preserve source layers, name them clearly, and keep the composite editable until final approval.
The neck opening should look like a cavity with fabric inside it, not like a white shape placed behind a cutout.
Finish without flattening the garment
Clean stray threads, pin dents, and isolated lint after the main composite is stable. Correct color across the entire garment rather than brightening only the insert. Preserve texture and small construction cues. Over-smoothing can make cotton, wool, denim, or ribbed knit look synthetic.
Inspect the result at 100% magnification before exporting, then review it at the intended ecommerce display size. At full size, look for halos around shoulders, repeated cloning patterns, jagged armholes, and fragments of mannequin material. At display size, check whether the garment still reads clearly in the crop and whether the neckline has enough contrast to communicate depth.
A clean composite is not necessarily a finished product image. It still needs the catalog's crop, background, shadow treatment, color profile, and naming convention. Keep those decisions separate from the mannequin removal so the same source can support multiple channels.
Consistency Controls Across a Full SKU Set
A catalog looks professional when the viewer stops noticing the studio decisions. Every garment should occupy a comparable position, show a comparable amount of margin, and sit on a background with the same visual treatment. That consistency comes from controls applied before editing, not from trying to match images by eye at the end.
Lock the physical setup
Keep the camera height, lens, distance, and lighting arrangement unchanged throughout a product batch. Mark the floor position of the mannequin and preserve the same orientation reference. If the form changes between categories, create a separate approved reference for that form rather than pretending that a different body shape can share identical framing.
Capture a gray card and color reference at the start of a batch, then repeat the check whenever the lighting or environment changes. Lock exposure and white balance. Automatic corrections can make individual files look acceptable while pushing the set apart from itself.
Batch control: Approve the first few edited garments before processing the rest. Finding tonal drift early is cheaper than correcting an entire finished set.
Turn preferences into templates
Define named crops for front hero, back, side, detail, and any approved alternate view. Apply those crops through actions, templates, or documented guides instead of freehanding every file. The template should control the placement of the garment, not force every product into an unsuitable crop. Long dresses, cropped jackets, and trousers may need category-specific versions.
Standardize the background tone, shadow density, sharpening, and output dimensions for each channel. Keep the shadow restrained enough that it supports contact with the background without creating a new visual object beneath the garment. Match sharpening to the final display size. Excessive sharpening exaggerates mask defects and fabric noise.
Use a simple approval grid to review the set:
- Framing: Check the shoulder line, center axis, hem position, and breathing room.
- Color: Compare neutrals, blacks, whites, and saturated garments against the approved reference.
- Edges: Look for halos, clipped fibers, mannequin fragments, and inconsistent softness.
- Construction: Confirm that buttons, labels, collars, cuffs, and openings remain truthful.
- Output: Open the exported files, not only the layered masters, and verify that the crop and background survive conversion.
A named checklist prevents the studio from relying on memory. It also gives the retoucher and merchandiser the same definition of “matching” before the batch is complete.
When Ghost Mannequin Imagery Is Not Enough
Ghost mannequin imagery answers what the garment looks like as an object. It doesn't fully answer how the garment fits a body, where the hem falls at different heights, how a stretch fabric behaves in motion, or whether a complete outfit works together. Treating it as the universal primary image creates a polished catalog that can still leave shoppers uncertain.
This limitation is most visible with garments where proportion drives the purchase decision. A structured jacket may need a mannequin to show the lapel and shoulder construction, but an on-body image can show whether those shoulders look narrow or oversized. Trousers may need a clear waistband and leg silhouette, while a model view gives better context for rise, inseam, and volume. A sweater can look tidy on a form while hiding how it drapes at the shoulder.
Choose the image mix by shopper task
| Garment Category | Ghost Mannequin | On-Body or AI Model | Detail Close-Ups |
|---|---|---|---|
| Structured shirts and jackets | Show collar, placket, lapels, and construction | Show proportion, styling, and shoulder fit | Capture buttons, stitching, lining, and hardware |
| Knitwear | Show overall volume and neckline shape | Show drape, ease, and sleeve behavior | Show knit texture, ribbing, and edge finish |
| Dresses | Show the full silhouette and back construction | Show length, movement, and body-level proportion | Show fabric surface, closures, straps, and hem |
| Trousers and skirts | Show waistband, leg shape, and construction | Show rise, drape, and length on a body | Show pockets, fasteners, seams, and fabric weight |
| Stretchwear and swimwear | Show panels, openings, and product details | Provide the strongest fit and coverage context | Clarify fabric, lining, seams, and hardware |
| Multi-item outfits | Show each garment as a standardized product asset | Show how the pieces coordinate together | Isolate the details that distinguish each item |
The right combination depends on the category and the shopper's unresolved question. A clean mannequin image can lead the gallery, while an on-body image follows with scale and styling. Detail crops then support close inspection rather than repeating the same full view.
AI-generated model imagery can help create that second layer when a full model shoot isn't practical, but it must remain faithful to the actual garment. Preserve distinctive details, construction, print placement, and proportions. AI virtual try-on for fashion ecommerce illustrates the broader role of generated model views in a product visual system, where the garment asset and the person context serve different jobs.
Decision test: If a shopper can still ask “How will this fit or move on a body?” after seeing the ghost mannequin image, add an on-body or model-led view.
Detail shots deserve the same deliberate treatment. A close-up of a zipper, knit surface, lining, heel, hem, or hardware can answer a material question that a full product frame cannot. The objective isn't to add images for volume. It's to assign each view a distinct job.
Final Review, Export, and a Production Habit That Prevents Reshoots
Final approval should happen at two scales. At full size, inspect the technical work: stray mannequin edges, mask halos, mismatched interior fabric, color cast, cloning artifacts, and clipped construction details. At the intended ecommerce display size, judge the commercial image: does the silhouette read quickly, does the product sit consistently in its frame, and can the shopper see the details that matter?
Use a fixed export checklist
Before delivery, verify the following:
- File naming: Include the product identifier, color or variant, view, and revision status in a predictable order.
- Color profile: Use sRGB for web delivery and reserve Adobe RGB for print workflows that require it.
- Resolution: Export according to each channel's approved requirement instead of resizing the same file blindly for every use.
- Crop: Confirm that the hero, back, detail, and alternate views use the correct template.
- Edges: Inspect the neckline, armholes, sleeves, hem, and any open garment area for residual mannequin material.
- Color: Compare the composite against the physical garment or approved reference, especially where the interior image was blended.
- Metadata and format: Open the actual delivery file and confirm that transparency, compression, and sharpening behave as intended.
Keep the layered master separate from the delivery asset. A flattened file is useful for publishing, but it removes the flexibility needed when a marketplace changes its crop, a color correction is approved, or a label needs to be restored from the interior source.
Save one reference composite per SKU
The production habit that prevents the most avoidable reshoots is a locked reference composite for every SKU. Save the approved front view, with its final garment shape, color treatment, crop logic, and mannequin removal, as the visual anchor for the rest of the product's image set.
This isn't a large style-guide binder that nobody opens during a deadline. It's one saved layered file that the retoucher can compare against before exporting the back, side, detail, or model-led assets. If the collar shifts, the color temperature drifts, or the product scale changes, the mismatch appears during review rather than after the merchandiser sees the catalog.
The reference file also protects continuity when work moves between people. A second retoucher doesn't need to infer how deep the neckline should look or how much shadow belongs beneath the garment. They can match a concrete approved result, preserve the product's visual identity, and make a controlled decision when the next source behaves differently.
Vtry AI helps fashion teams turn garment assets into consistent product and outfit imagery, including AI-generated model views that complement ghost mannequin packshots. Use Vtry AI to build a fuller visual system around your catalog and create the additional fit, styling, and merchandising views that a mannequin image can't provide.
Composed with Outrank app