4K upscaling AI
4K Upscaling AI: How It Works and When to Use It
Learn how 4K upscaling AI works, which model types to trust, and when native 4K or upscaling fits your product image workflow.
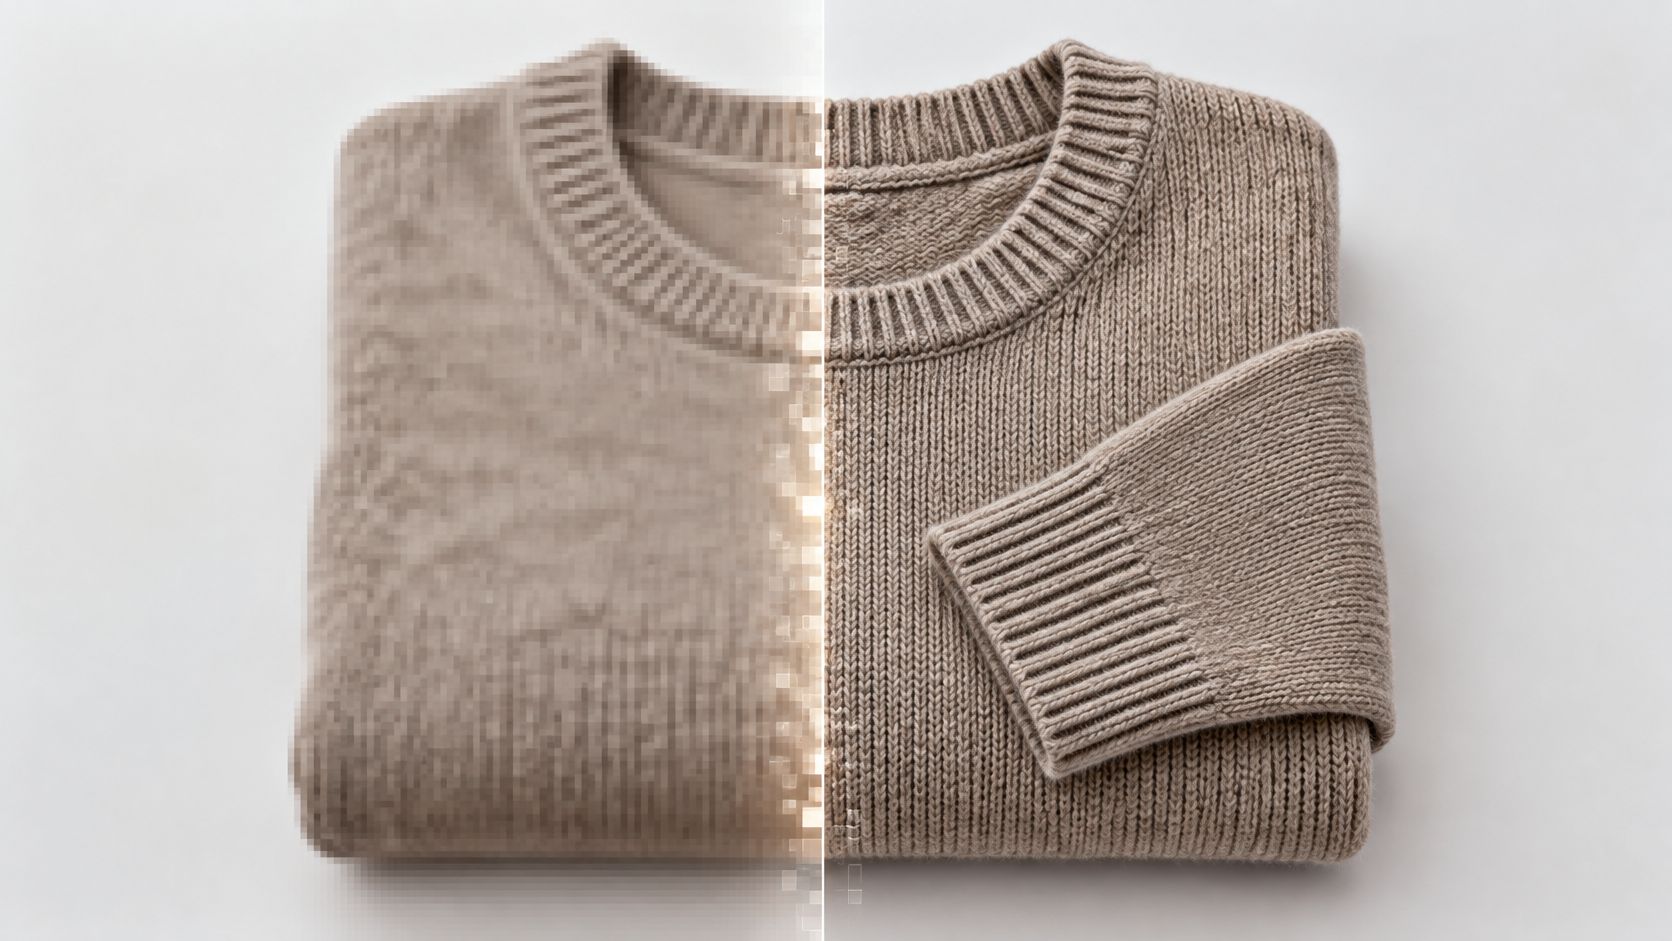
The most popular advice on 4K upscaling AI is also the most misleading. You're told to upscale everything to 4K, as if more pixels automatically means a better product image. Don't do that. A 4K file only proves the output is bigger, not that the detail inside it is true.
That distinction matters more in fashion ecommerce than in almost any other category. A model that invents a convincing knit, a clean logo, or a new seam can create a beautiful image that misrepresents the garment your customer is about to buy. The useful question isn't how to get to 4K. It's which images should get there, which route should take them, and which ones are safer left smaller and faithful.
Table of Contents
- What the Pixel Math Means for Your Images
- The Model Families Behind AI Upscalers
- Why Sharper Does Not Always Mean More Accurate
- Which Assets Hold Up Under 4K Upscaling
- Choosing Native 4K or Upscaling by Situation
- How to Run an Ecommerce Upscaling Workflow
- Confirm Your 4K Route Before You Publish
What the Pixel Math Means for Your Images
Start with the arithmetic, because it tells you how much guessing you're asking a model to do. 4K UHD is 3840 × 2160 pixels, or 8,294,400 pixels per frame, four times the pixel count of 1920 × 1080 Full HD, according to the Dataintelo UHD panel sales market report. Every step toward that size multiplies the number of pixels the model must produce.
| Source size | Scale factor to 4K | Pixel multiplier |
|---|---|---|
| 960 × 540 | 4× | 16× |
| 1280 × 720 | 3× | 9× |
| 1920 × 1080 | 2× | 4× |
Reading the multiplier in plain language
The scale factor applies to width and height separately, so the total grows fast. A 960 × 540 source enlarged 4× in each direction finishes with 16 times as many pixels. Only one of those sixteen positions came from your original file in any direct sense. The rest are reconstructed.
A 1920 × 1080 source is a different job entirely. It needs 2× per dimension, or 4 times the pixels, and a 2560 × 1440 source needs only 1.5×, or 2.25 times. Same destination, very different amounts of invention.
Reconstruction, not stretching
Super-resolution is the technical name for what AI upscalers do. The model doesn't spread existing pixels further apart. It predicts the edges, textures, and fine structures that a sharp original would likely have contained, based on patterns it learned from other images.
Think of a tailor letting out a garment. She doesn't stretch the fabric until it thins. She follows the original pattern and adds material that matches it. An AI upscaler works the same way, following the pattern it sees in your image and filling in what should logically be there.
Plain bicubic scaling is the stretching approach. It averages neighboring pixels to fill the gaps, which keeps tones smooth but adds no real detail. It's also the baseline every learned model is measured against, so when a tool claims to beat standard enlargement, bicubic is usually the comparison point.
A 4K file proves the dimensions. It doesn't prove the detail was recovered.
That's the takeaway to carry into every decision that follows. A small, soft, heavily compressed source gives the model little pattern to follow, so it guesses more. A clean, sharp source near the target size gives it plenty to work with. The right route depends on your source quality and on what the finished asset has to do, not on a blanket rule that everything should be 4K.
The Model Families Behind AI Upscalers
Upscalers aren't one technology. They're a sequence of approaches, each built to fix the weakness of the one before it, and each still in use somewhere in current tools.
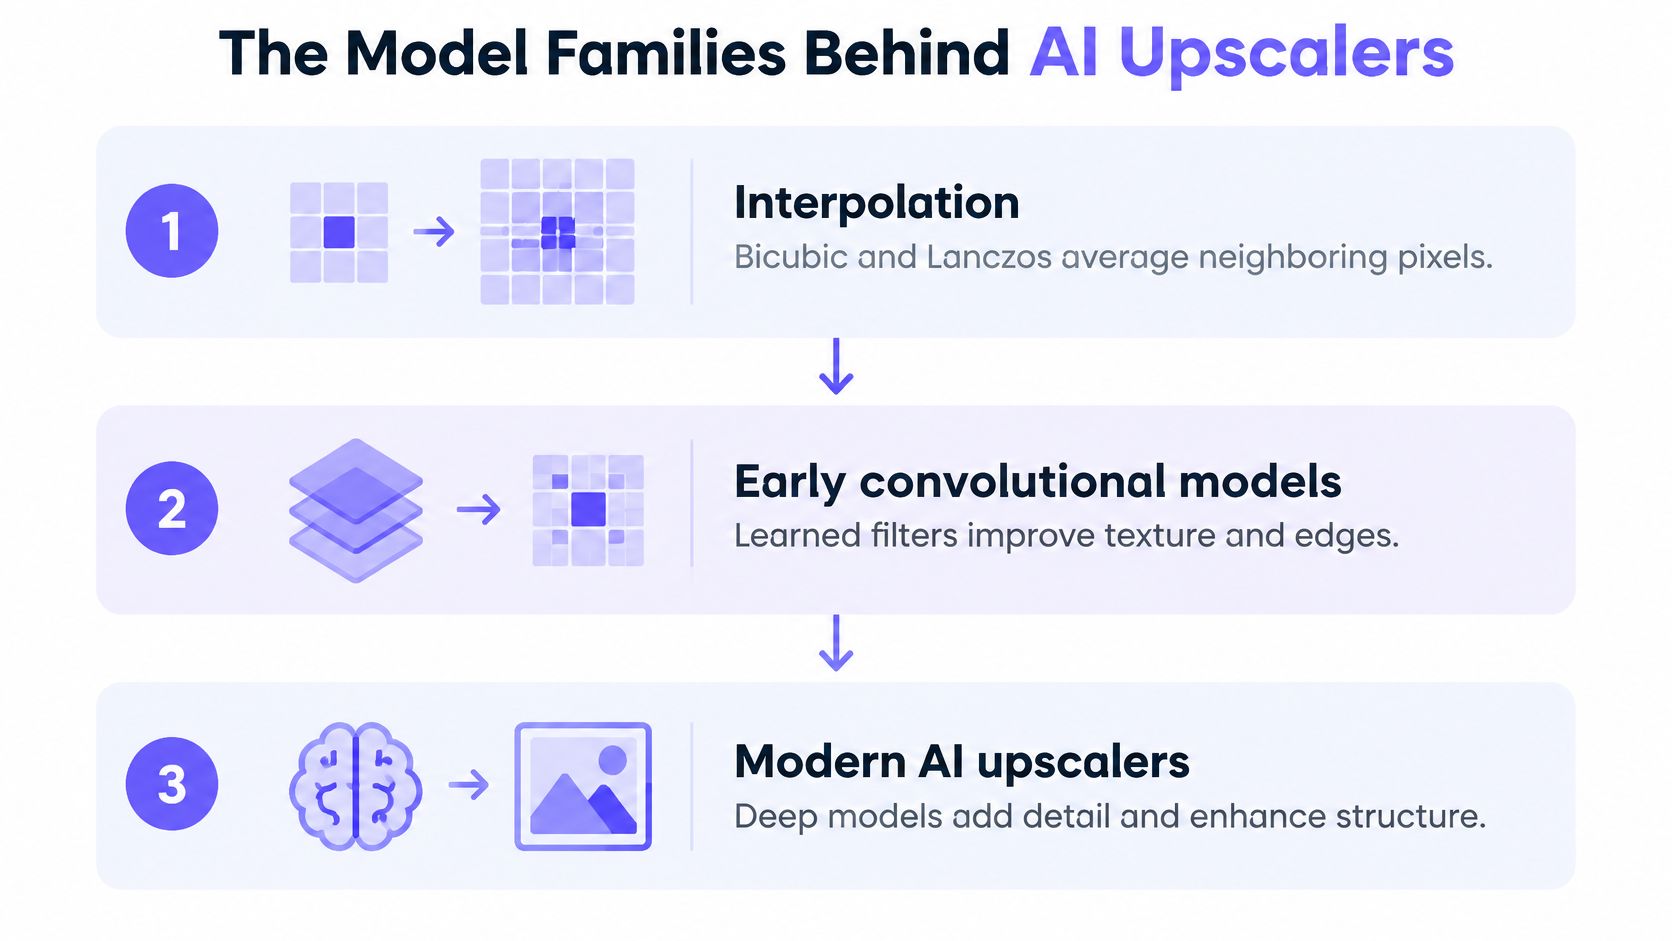
Interpolation came first. Methods like bicubic and Lanczos average the pixels around each gap and produce a smooth, soft result. Nothing is invented, and nothing is recovered either.
Early convolutional networks changed that. SRCNN was an influential early CNN approach that learned filters from training images instead of averaging blindly. Deeper CNNs such as EDSR and RCAN pushed pixel fidelity further, and they still tend to score highest on measures that reward matching a reference image exactly.
Then came models built to please the eye rather than the metric. ESRGAN and Real-ESRGAN use adversarial training, where a second network judges whether the output looks like a real photograph. Transformer models such as SwinIR add wider context across the image, and diffusion-based super-resolution generates texture through an iterative denoising process. The arXiv review of single-image super-resolution traces this path from interpolation and early CNNs to GANs and transformer-based models, and it reports leading benchmark PSNR results of 34.79 dB for WRAN, 34.54 dB for RCAN, 34.48 dB for SAN, 34.40 dB for Meta-RDN, and 34.33 dB for EDSR on selected datasets.
| Model family | Example methods | Optimises for | Main risk |
|---|---|---|---|
| Interpolation | Bicubic, Lanczos | Smooth pixel averaging | Soft edges, no new detail |
| Early CNN | SRCNN | Pixel fidelity | Blur on fine texture |
| Deep CNN | EDSR, RCAN | Pixel fidelity and PSNR | Smooth-looking results |
| GAN | ESRGAN, Real-ESRGAN | Perceptual sharpness | Ringing, overshoot, invented texture |
| Transformer | SwinIR | Reconstruction with global context | Heavier compute; global context does not guarantee faithful detail |
| Diffusion | Diffusion-based super-resolution | Texture synthesis | High compute, colour shifts |
How to read those benchmark scores
PSNR is measured in decibels and SSIM is a structural similarity score. Both compare an output against a known reference image. That makes them useful for ranking models in a lab, but a top score doesn't make a model right for your product photo. A deep CNN can win on fidelity while looking slightly smooth, and a GAN can look crisper while changing the texture it's supposed to preserve.
Choose the family by what your image must protect. If it's a model's identity, a garment's construction, or an exact colour, favour fidelity. If it's a lifestyle scene where believable texture matters more than exact weave, a perceptual model has more room to help.
Why Sharper Does Not Always Mean More Accurate
Many people assume a sharper image is a more accurate one. In super-resolution, those are two separate goals pulling in opposite directions.
Fidelity means matching the true pixels. Realism means looking convincing to a human eye. The Real-ESRGAN research on arXiv explains that modern systems commonly combine reconstruction losses, perceptual losses, and adversarial or diffusion-based generation, where reconstruction objectives preserve measurable fidelity and perceptual objectives encourage realistic textures. The same research documents ringing and overshoot artifacts that can be amplified from the input.

Why the scores and your eyes disagree
PSNR and SSIM generally favour regression-based methods that play safe and average out uncertainty. Human viewers often prefer the generative result because it has visible texture. Neither side is wrong. They're answering different questions, and a higher PSNR doesn't automatically mean a more convincing fashion image.
Say you're upscaling a close-up of a knitted jumper. The source shows a soft hint of stitch structure. A generative model fills in a crisp, regular stitch pattern that looks completely natural on screen. It may also be the wrong stitch. The actual garment might use a different gauge or an irregular hand-knitted repeat, and your customer will compare the photo with the item that arrives.
Neural methods do beat bicubic scaling, and on a clean source that advantage is real. But the gain shrinks when the source doesn't contain the information the model needs. At that point the model stops reconstructing and starts decorating.
Three checks at 100 percent zoom
- Halo edges: Look along garment seams and collar lines for a bright or dark fringe that isn't in the source. That's overshoot, and it makes construction look sharper than it is.
- Repeated or waxy texture: Scan fabric areas for a stamped, repeating pattern or a plastic smoothness. Both signal invented or averaged texture.
- Altered small details: Read any printed text letter by letter and count buttons and stitches. Small elements are where models change facts first.
Run a proper before-and-after check before you trust an output. Take a 100% crop of a garment seam from the source and place it beside the same crop after upscaling. Mark the halo, texture, and small-text checks on that pair and note which one changed. If the seam gained a clean double-stitch the source never showed, that change matters, because a product page makes a promise about construction quality.
When accuracy matters more than sharpness, a softer faithful output is the safer choice.
Which Assets Hold Up Under 4K Upscaling
Sort by asset type, not by tool. The same upscaler that's harmless on a plain packshot can rewrite a logo, a weave, or a face.
| Asset type | Hallucination risk | Review check |
|---|---|---|
| Product on plain background | Low | Edges and colour match |
| Full outfit on a model | Medium | Face, hands and hem shape |
| Close-up fabric weave | High | Weave pattern against original |
| Garment with logo or printed text | High | Logo and letter shapes |
| Dark fabric with fine pattern | Medium to high | Banding and lost pattern |
| Low-resolution marketplace photo | High | Source drift and artifacts |
A product packshot on a plain background is your lowest-risk case. Edges are simple, there's little fine texture to invent, and errors are easy to spot. A full outfit on a model sits in the middle, because faces, hands, and hem shapes give the model more places to drift. If you're building these assets from scratch, our guide to AI product photography covers how to set them up well before resolution enters the picture.
Close-ups of fabric weave and garments with logos or printed text are high risk. These are exactly the details a customer zooms into, and exactly the details a model is most likely to redraw. Dark fabrics with fine patterns run medium to high risk because banding appears and subtle pattern gets swallowed. Low-resolution marketplace photos are high risk for a simpler reason. The source limits what any model can produce.
An independent comparison of AI upscaling reports that neural methods often improve over bicubic scaling by roughly 1 to 2 dB PSNR and 0.05 to 0.1 SSIM, yet generated fine detail can diverge further from the true photograph when the source lacks enough information. That's the pattern behind the table. Gains are real, and so is drift.
The trust boundary
Think of each image as containing regions you trust and regions you don't. Classify those regions before you upscale. Keep low-confidence areas tied to the original, and require a person to review anything that defines the product, including brand marks, colour, and construction. High visual polish combined with high drift from the source is a warning sign of hallucination, not a sign of quality.
Build a representative test set before you commit to a route. Include people, full outfits, close-ups, dark fabrics, fine patterns, text, and low-resolution product images. Keep synthetic tests, where you downscale a known image and compare against the original, separate from real photos where no ground truth exists. Mixing the two gives you numbers that don't describe either case.
Treat the risk ratings in the table as working judgments, not guarantees. Your own test set confirms or revises them. Then apply one acceptance rule across the board.
Acceptance rule: Approve an output only when identity, colour, logos, and garment geometry match the source, and no detail appears that the source could not support.
Choosing Native 4K or Upscaling by Situation
Two routes can put the same dimensions on your export. Native 4K generation creates the image at full size from the start, so detail is planned in during generation. 4K upscaling enhances an existing image after it's made, so detail is reconstructed afterward. In Vtry AI we keep those routes distinct for exactly this reason, because where the detail comes from shapes what you can trust.
What actually drives the cost
Three things set the price of a 4K asset, whatever platform you use. Pixel count comes first, because a model processing a 4K image handles a far larger spatial tensor than one working at draft size. Generation passes come next, since diffusion-based approaches refine an image over many steps. Review time is the one teams forget. Every high-risk output needs a person at 100% zoom, and that time scales with your catalog.
The Springer survey of diffusion-based super-resolution identifies high computational demand, color shifts, and limited explainability as deployment risks, and it reports a Real-ESRGAN comparison with average PSNR of 29.15 dB and SSIM of 0.78. Those values measure similarity to a reference image, not whether generated garment details are factually correct. There's also a structural catch. Many systems process large images in patches to save memory, which can sacrifice global context and introduce spatial inconsistency across patch boundaries.
That's why upscaling works best as a final-render step applied once. Running it after every edit compounds drift, costs more, and gives patch inconsistencies more chances to appear.
| Situation | Recommended route | Reason | Check before approval |
|---|---|---|---|
| Iteration and drafts | 1K generation | Fastest and most efficient for testing looks | Switch to the final route once approved |
| Catalog or social with a sharp source | 2K generation or upscale | Enough detail for most feeds | Inspect at 100% first |
| Hero ad or print needing fine detail | Native 4K | Detail built at full size from the start | Compare with reference for drift |
| Source already 4K-ready | No upscale | Extra pixels add little | Export and review only |
| Logo or text-critical product | Native 4K or original | Avoids invented marks | Compare marks to the source |
Work through the table by situation. Draft at 1K while you're testing looks, because speed matters more than finish. Use 2K when the source is sharp and the destination is a catalog grid or social feed, where viewers rarely see 100%. Reserve native 4K for a hero ad or print piece that needs fine detail built in from the start. Skip upscaling entirely when the source is already 4K-ready, and don't upscale a logo-critical product unless you'll check every mark against the original.
The cheapest route that still passes review is the right one. Paying for pixels your channel never displays, or for detail your reviewer then rejects, helps nobody.
How to Run an Ecommerce Upscaling Workflow
Order matters here. Each step exists to stop a specific kind of waste or error, so don't rearrange them to save time.
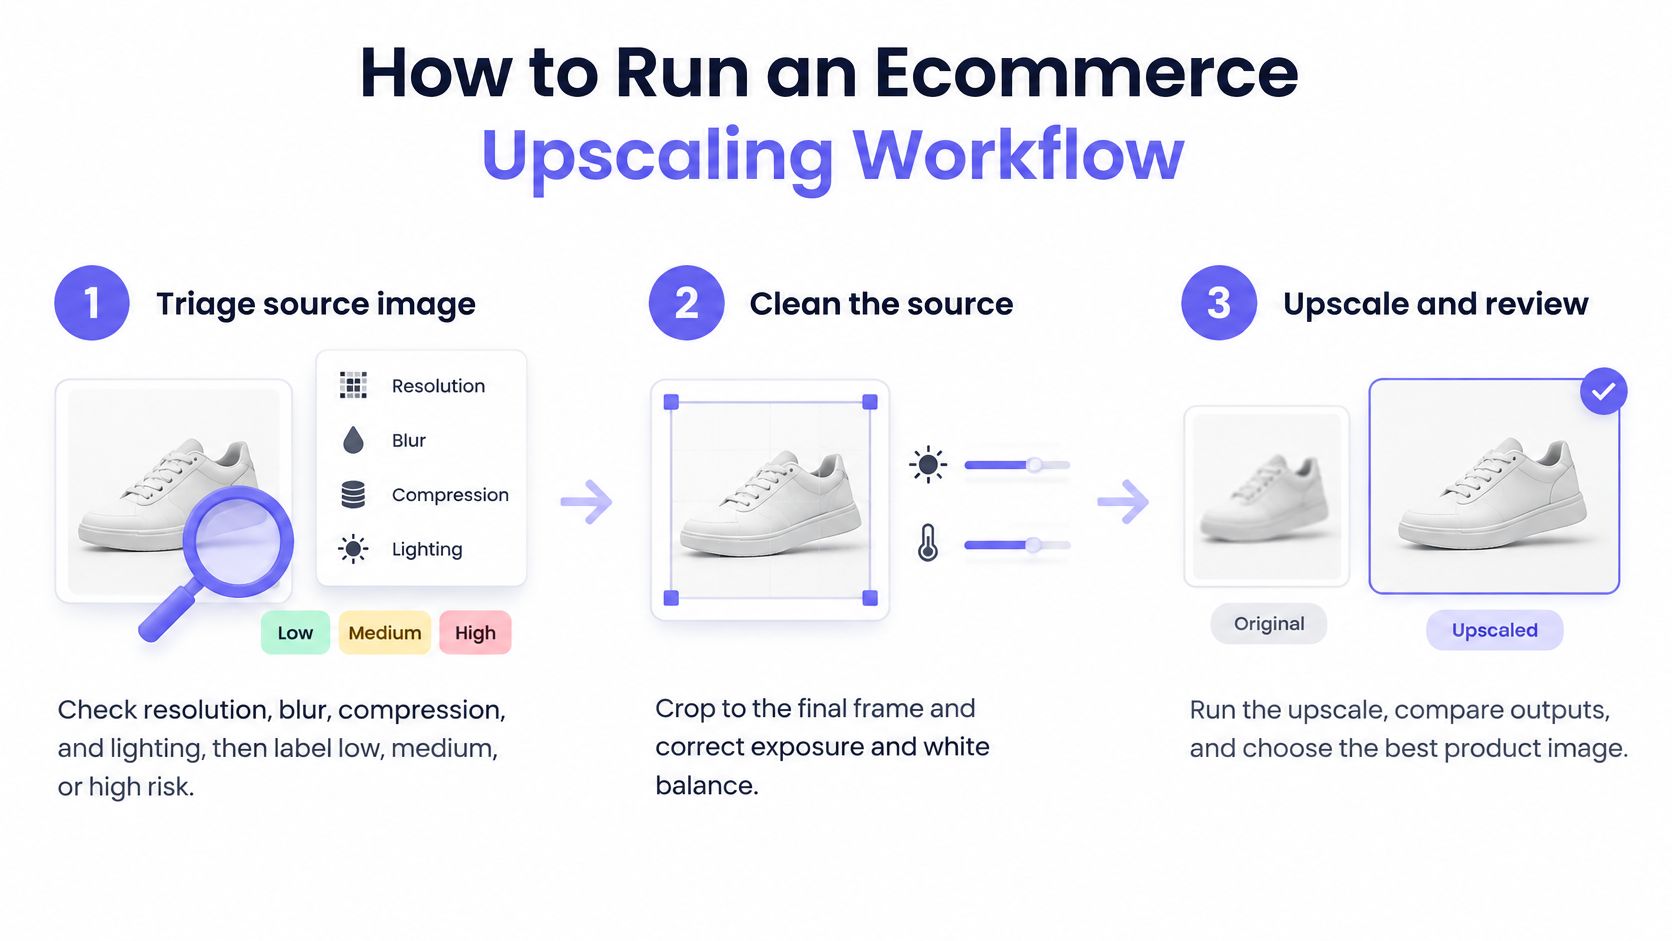
Triage the source. Check resolution, blur, compression, and lighting, then label each image low, medium, or high risk. This step exists because the label decides how much review the image earns later, and guessing that at export time is how bad assets slip through.
Clean before you enlarge. Crop to the final frame, correct exposure and white balance, and reduce compression noise. Upscaling amplifies noise and artifacts along with detail, so anything you leave in gets louder. Our walkthrough on how to edit product photos covers these corrections in practical order.
Pick the model family by asset type. Use a fidelity-first route for product packshots and anything with marks or text. Use a texture-friendly route for lifestyle scenes where believable surfaces matter more than exact weave. One default setting for a whole catalog is how packshots stay safe and close-ups go wrong.
Upscale once, from the cleanest version. Don't upscale after every edit. Repeated passes compound drift, so finish your edits first and treat the upscale as the final render.
Inspect at 100% magnification. Go through faces, hands, logos, hems, buttons, seams, and printed text in that order. Fit-to-screen review hides exactly the artifacts that cause returns, because a halo or a redrawn letter disappears at small sizes.
Compare against the original and log drift. Check identity, garment geometry, colour, and marks side by side. Write down anything that changed in one short line. That log is what turns a one-off judgment into a route decision your whole team can reuse.
Keep files separate and export per channel. Store the original and the approved 4K as distinct files with clear names. Then export versions for the product page, marketplace listing, and paid ad separately, since each channel crops and compresses differently. Keeping the original is essential, because it's your only evidence of what the garment looked like.
A concrete batch example
Say you're preparing a 40-image collection launch. Triage all 40, clean the keepers, and run the upscale once. Before the batch export, review at least 10 percent, so four images, at full magnification, and make sure those four include your highest-risk items rather than four easy packshots. If a logo fails or a weave drifts, send that image back to step one with a cleaner source instead of pushing it through another upscale pass.
Confirm Your 4K Route Before You Publish
Don't set a catalog-wide policy from one impressive before-and-after. Run a small pilot and let the results decide.
Pick about ten images covering every asset type in the risk table. Include at least one full outfit on a model, one garment with a logo or printed text, one dark fabric with a fine pattern, one low-resolution marketplace photo, and several plain-background packshots. Process each through the full workflow, then inspect every output at 100% against its original. If marketplace listings are your priority channel, our guide to product images for Amazon explains what those listings demand from an image.
Record each result as approve, rework, or keep the original, with one line naming any drift you found. Then set the route per asset type from that record. Draft at 1K while iterating, use 2K for sharp catalog or social sources, choose native 4K for hero ads or print where detail must be built in, and keep the original for any logo-critical item that fails.
Those two routes are the choice in practice. 4K upscaling enhances an existing generated image after it's created, which suits a finished, sharp source. Native 4K generation creates the image at full resolution from the start, which suits hero and print work where detail needs planning. A 4K file proves dimensions, not recovered detail, so your pilot record, not the file size, should be what approves an image for a product page or ad.
Run your ten-image pilot in Vtry AI, where you can generate outfit images at 1K and 2K for drafts, then finish with 4K upscaling for sharp sources or native 4K generation for hero assets. Bring your own risk labels, inspect at 100%, and publish only what passes.